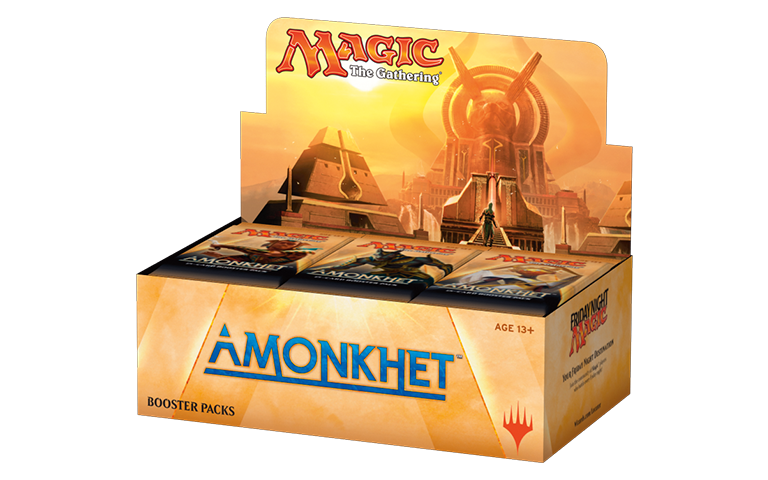
Remember: booster packs are built for drafting.
Your first Magic: the Gathering draft can be intimidating, to say the least. You will likely find yourself surrounded by players of varying levels of experience, forced to make difficult decisions on your toes.
Nevertheless, spend enough time drafting, and you’ll see why many players find it one of the most rewarding ways to enjoy the game. Among other formats, Wizards of the Coast R&D builds new sets for limited play, meaning draft and sealed may be the only way many players can experience certain aspects of a particular block’s gameplay design. Draft also forces you to evaluate cards in a different light than when thinking about Standard, Modern or Commander.
That doesn’t mean you need to go in blind! If you are about to participate in your first draft (or simply need a refresher), these tips are for you.
1. Familiarize Yourself with the New Set & New Mechanics
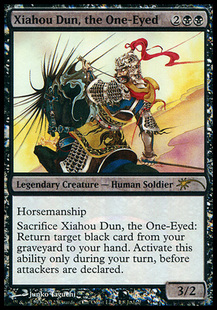
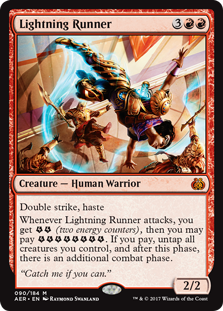
Would you know what Horsemanship meant if you opened this card in draft?
When it comes time to draft, you’ll be faced with a lot of cards to quickly evaluate, and you don’t have forever to read every card multiple times. Hopefully you won’t be too rushed, but there is a limited amount of time (typically 50 minutes) to complete the draft and build your deck. It can be overwhelming at first.
Before heading to the event, take some time to learn about the set you’ll be drafting. Each new set in Magic: the Gathering will usually include a couple new mechanics that you should learn ahead of time. That’s not to say you’re obligated to memorize every card, but you should at least know what general themes and new mechanics you may face.
Check out magic.wizards.com, or search online for the new set name plus “spoiler” to see the set in full. Reading up a bit on the focus of each color or color pair in any given limited environment can give you a great head start on your first draft.
Another way to learn about a set before jumping into draft is to attend a prerelease event. Participating stores will hold multiple events over the course of the prerelease weekend (the week before set release), and you’ll be in the company of many other players learning about the new set for the first time.
2. Assemble Your Supplies
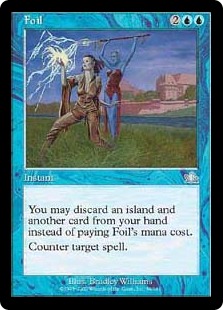
Protect your foils.
There are tons of Magic accessories you can buy, but don’t feel like you absolutely need every knick knack on the market to participate. At the very least, you should bring a way to keep track of your and your opponent’s life totals. I personally recommend a good ol’ pen and paper, but many players use a spindown d20 life counter. These are typically found in Bundles (previously called Fat Packs) or prerelease kits, but you can buy them as well. A small pad of paper is my preference, because it’s easier to reference how life totals change over time, and it’s not going to get bumped, causing confusion. It’s also important for both players to keep track of both life totals so disputes or confusion can be quickly resolved.
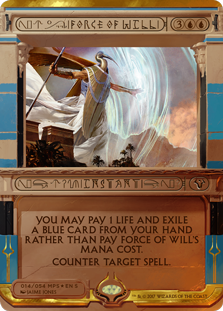
Beyond life totals, I highly recommend a set of sleeves. You’ll need at least 40 of them for your deck (plus a some extras in case one becomes damaged or marked). You do not need to buy the best or most expensive option at the store, but most players use them for a few reasons. They make shuffling easier, for one. They also protect any valuable cards you may pull in the draft. Did you open a sweet Force of Will invocation? A sleeve is necessary unless you want to shuffle away the card’s value. One final reason to use sleeves is to ensure your cards are not marked in any way. Stores will usually provide basic lands you can use for the duration of the draft (make sure to return them after), but they have been used by many other players. You do not want to be in a situation where you can tell from the back which cards are lands.
Additionally, you may want a playmat and dice or other counters you may need in game. These are not necessary to play by any means, but many players like to have these basic supplies with them. It’s not only a way to make your gameplay more convenient (so you can focus on the game itself), but adding a few things here or there will allow you to personalize the experience a bit.
3. Look up the Chase Cards
“Get the sleeves, Ma!”
Picking a card just because it’s rare is not often the best way to build your deck. For example, if you open your third pack and it has a powerful rare that you can’t play in the deck you’ve drafted up to that point, it may just be a dead card. If there was also a powerful common or uncommon that did fit with your deck, you’ve now missed an opportunity to make your deck more powerful.
However, if you’re not in a highly competitive event, and that card would recoup the cost of your draft, go ahead and grab it. If one or two cards let play for the night at a net positive, it’s perfectly fine to take cards that may make your overall deck less powerful. Particularly when you’re just starting to get into limited, picking a sweet rare – even one that’s not valuable – can ease some of pressure to perform. If you do pull that invocation or chase foil rare, take it!
I do not recommend memorizing all the prices, and prices will certainly change dramatically over time, but it’s a good idea to look at online single sellers to find out what handful of cards for which you might want to be on the lookout.
4. Remember – “Left, Right, Left”
Repeat after me: “Left, Right, Left.”
“Left, Right, Left.”
“Left, Right, Left.”
In draft, you will open your first pack, select a card, and pass the whole pack to the left. The person to your right will be passing you their pack. This repeats until all cards in the pack are gone.
After that, you will pass your second pack to the right. Finally, the third pack will go back to the left. It always follows that pattern, and handing your pack the wrong direction can cause confusion. If packs get mixed up, it more or less breaks the pattern players are relying on to build their decks, so it’s important to always remember: “Left, Right, Left”.
5. Avoid Mixing Up Your Picks & Packs
As with the last tip, one of your main priorities while learning how to draft should be to avoid disruption wherever possible. A smooth draft requires all players to be attentive of not only what they are doing, but what future opponents are doing. Accidentally mixing your cards with another pack or cards you have picked could cause a draft to fall apart.
My preferred method of keeping my picks separate from all other packs is to deliberately stack my picks on top of my unopened packs. Once I place a card down, I never pick it up unless I’m looking through all of my picks to review what I’ve chosen in the past. Further, at no point will I hold both my prior picks and current pack at the same time – strictly one or the other.
6. Zone Draft
 One final way to ensure the draft runs in an orderly fashion is to always zone draft. (I know, I’m beating a dead horse here… but it’s important!) What does that mean? When you zone draft, imagine that the table is divided into multiple zones, each of which can hold only one pack at a time. There is a zone for each player, and a zone in between each player.
That means you can only ever have a single pack to your left, a single pack to your right and a single pack in front of you. If there is a pack already in the zone to which you’re attempting to pass (“Left, Right, Left”), wait until the next player has made a pick and the zone between the two of you is clear.
For example, let’s pretend it’s pack one. I make a selection from the current pack in my hands, and attempt to pass it to the drafter on my left. However, I realize that they are looking through a pack, and there is already a pack between the two of us. I will wait to pass the pack I’m holding until they have made a selection, and the zone between us no longer has a pack.
It should always be obvious which pack a player is about to grab after making their pick. At no point should you stack one pack on top of another or line up multiple packs for the next player.
7. Build Your Deck
Mythic ≠ “Good”
You’ve made it through perhaps the most intimidating part of drafting – sitting at the table and making your picks. Since this is an absolute beginner’s guide, I won’t go into much detail about how to actually pick cards for your deck (particularly since it varies from set to set). In general, however, make sure you take some removal and enough creatures to actually take on your opponent in combat.
When building your deck after the draft portion, your job is to build a deck with a minimum of 40 cards. The rules say “minimum,” but in practice, you want to keep your deck to 40 cards in almost all situations. It will be tempting at first to keep in every cool card. After all, why not sneak an extra card or two into the deck?
Each card beyond 40 only serves to lower your chance of drawing the most powerful spells at your disposal. As you draft more often and learn more about the current set, you’ll likely learn that some cards look more powerful than they actually are, and you may have previously underestimated others.
Again, it changes from set to set, but in most cases, you’ll want to build a 40 card deck with 16-18 lands and 22-24 of your best cards at a variety of converted mana costs. It’s also a good idea to make sure at least 1/2 to 2/3 of your deck consists of creature cards. The finer details will come to you over time, but you can also do some searching around the internet before the event if you want to dig deeper into deck building for the specific set you’ll be drafting.
8. Don’t Be Scared to Change Your Deck
Most limited events (like draft and sealed) are considered “continuous construction” tournaments. That means rather than sideboarding between matches and returning your deck to a default state, you can reconfigure your deck with the cards in your pool at any time you’re not playing a game. Want to sideboard a card in between matches and never take it out? Go ahead! Want to change colors between rounds? Why not!
You may find that some cards do not perform the way you thought they would. As long as you’re not actively in a game, you can make all the changes you want. Just remember that you cannot use any cards outside of the cards you drafted during this specific event (except basic lands, of course).
9. Ask a Judge
Learn something new every time you play.
If you have questions, ask a judge! All too often, newer players who have rules questions (or even just players new to the store that’s hosting) will hesitate to call a judge. If you do not understand an interaction or have any kind of dispute with your opponent, raise your hand, call the judge and keep your hand raised until the judge arrives.
While you should remain polite and civil, you are not obligated to take another player’s word for it when it comes to rules disputes, and a judge may be able to explain an interaction in a way that’s easier for you to understand. The judge is there to help!
(Bonus Tip: Thank your judges for their help. Judges often do not get the recognition they deserve for their hard work giving back to the Magic community, and I’m sure your judges will be happy to hear you appreciate them.)
10. Have Fun, Learn & Don’t Get Discouraged!
There is a good chance your first draft won’t go as well as you’d hope. Unfortunately, it’s common to see brand new drafters become dejected if their deck does not perform. As someone who wants to spread the joy of limited, I always fear those players will never return.
Rather than worry about your record, use your first draft as an opportunity to have fun playing a new format and to learn how you can improve next time. There is a lot to take in when it comes to limited, but I hope if nothing else, you enjoy your drafting experience.